Assembing PV solar connectors can be a tricky job if you haven’t done it before. Here a quick guide.
Equipment
1 pair of PV solar connectors
PV (solar) cable to connect to
Wire cutter
Wire stripper
Solar Crimper or soldering iron
Planning
First of all, work out your wiring configuration and correct wires lengths and sizes. If you are unsure, we are happy to help.
When you have you cable, lay it out to make sure you have the right lengths. If you have a crimper, you can put it in it’s final position. If not, it may be easier to do so later, as soldering while on a roof top is much harder than crimping.
Note: Negative connector plugs into the positive plugs, so a red (positive) cable will not only have positive connectors on it.
Cutting and Stripping
Cut the cable to the required length if needed. If in doubt, do not cut it is all completed (but not connected). Strip about 8mm (1/3 inch) where the connector will be fitted.
Fitting the Terminals
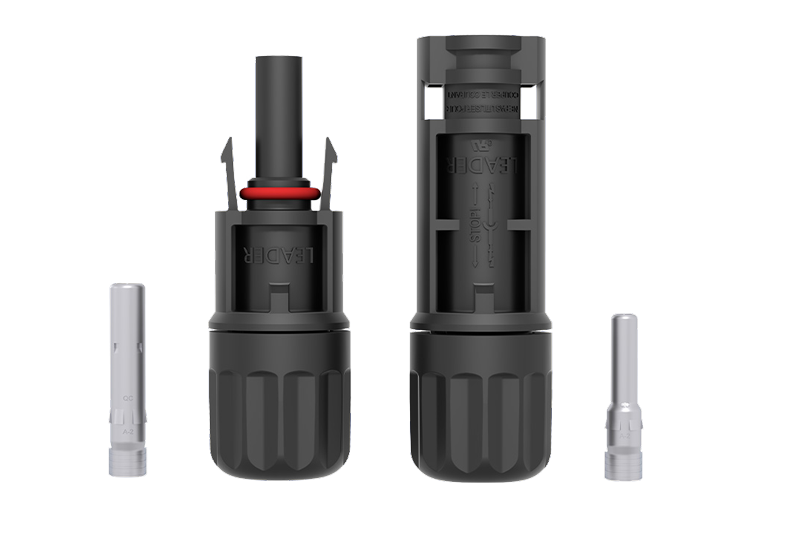
Select the appropriate terminal. Remember the positive terminal is the largest of the two.
Place the terminals crimp end into the crimper and place the stripped cable end into the crimp. Closer the crimper full to ensure a tight connection.
If you do not have a crimper, you can tighten the crimp with some pliers. They MUST be soldered after this. If not, you risk having a bad connection, which is a fire risk.
Position your Cable
If you have not done so already, put your cable in it’s final position. Once the connector housing are place on the terminal, you will not be able to fit the connectors through small holes, such as our cable entries, and pulling cables through walls etc will be much more difficult.
Fit the Connector Housings
Push the positive terminal into the positive housing. It should click into place and you should not be able to pull it out. If it does not click in, pull it out and try again. Sometimes it can take a few tries. Once secure, tighten up the nut on the end so that the crimp ring bites into the cable and the gasket provides a water tight seal. Normally hand tight enough, but a spanner can be used.
For the negative connector, first plug it into a completed positive terminal, then follow the same process. This ensures that the terminal is properly aligned. If you fail to do this, the connectors may not fit to gether. This can usually be fixed by loosening the nut and,if neccessary, moving the non-crimp end if the terminal to the middle using a small screwdriver or similar object. Then plug it into a completed positive connector and tighten the nut. Undo the connector and then try to connect it again.